Ho ho ho!! It's that time of year again... And that means presents of all sorts, types, sizes, and colors!! (Not to mention the yum-yum cookies!)
And thus, we need to give our friends and familia a wonderful gift, right?
"Right Gracie, you're always right. Plus you're pretty and intelligent and kind and thoughtful. OH! DId I mention that you are PRETTY?" (I'm kidding ~ only a figment of my semi-wild imagination)
So here's a crochet pattern that they might like from planetjune.com making amigurumi pears! Yay!
What you'll need:
Size E crochet hook/ 3.5 mm
worsted weight yarn in pear colors and a brown for the stem
NOTE: Rounds are worked in a continuous spiral
Note (again): After this these are her words EXACTLY. Maybe got to her blog to see how it's really done :P
Pear
"worked from top downWith a pear-coloured yarn, make a
magic ring, ch 1.
Rnd 1: 6 sc in magic ring. (6 st)
Rnd 2: 2 sc in each st around. (12 st)
Rnd 3: (2 sc in next st, sc in next 3 st) three times. (15 st)
Rnd 4: sc in each st around. (15 st)
Rnd 5: (sc in next 2 st, 2 sc in next st, sc in next 2 st) three times. (18 st)
Rnds 6-9: sc in each st around. (18 st)
Rnd 10: (2 sc in next st, sc in next 2 st) six times. (24 st)
Rnd 11: (2 sc in next st, sc in next 3 st) six times. (30 st)
Rnds 12-13: sc in each st around. (30 st)
Rnd 14: (2 sc in next st, sc in next 4 st) six times. (36 st)
Rnds 15-17: sc in each st around. (36 st)
Rnd 18: (sc2tog, sc in next 4 st) six times. (30 st)
Rnd 19: sc in each st around. (30 st)
Rnd 20: (sc2tog, sc in next 3 st) six times. (24 st)
Rnd 21: sc in each st around. (24 st)
Rnd 22: (sc2tog, sc in next 2 st) six times. (18 st)
Rnd 23: (sc2tog, sc in next st) six times. (12 st). Stuff pear through hole, making sure to push the stuffing right up to the tip of the pear.
Rnd 24: (sc2tog) six times. (6 st). Cut the yarn, leaving a long (approx 12″/30cm) yarn end.
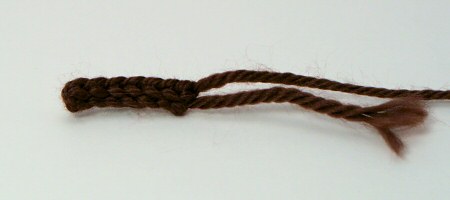
Stalk
With brown or black yarn, ch 7.
Row 1: sl st in 2nd chain from hook and in each remaining chain. (6 st)
Note: I like to work into the back bumps of the chain, but you can work into the chain normally if you prefer.
Cut yarn, leaving a long (approx 12″/30cm) yarn end. Draw end through last loop and pull tight to fasten off.
Finishing
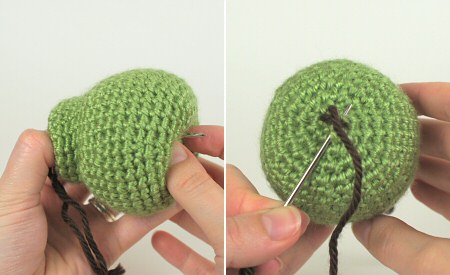
Using a yarn needle and the long yarn end from the pear,
close up the remaining hole at the bottom of the pear. Pass the yarn end through the pear, coming out somewhere along its side. Draw the yarn tight, and snip the end close to the pear. The yarn end should retract back inside the pear after it is cut.
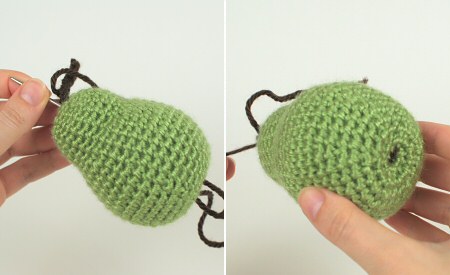
Using a yarn needle and the long yarn end from the stalk, pass the yarn through the pear from top middle to bottom middle (you’ll have to squash the pear to get the needle all the way through!), so the base of the stalk sits over the magic ring at the top of the pear.
Make 3 small overlapping stitches at the bottom of the pear, to form an asterisk shape.
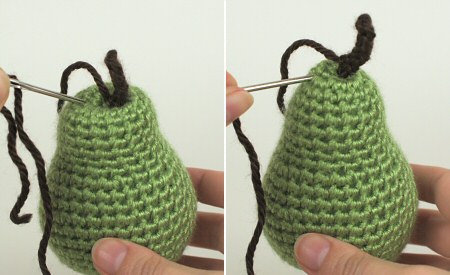
Pass the yarn end back up through the pear to the top, then pull the yarn tighter so that the bottom of the pear is drawn up slightly to help flatten the base.
The top of the pear may have been squashed down when you tightened the yarn. If so, insert the yarn needle under a few stitches at the top and pull up to lift the top of the pear back into shape.
Knot the yarn end and the starting tail from the stalk together, then thread both ends onto the yarn needle and pass them through the pear, coming out somewhere along its side. Draw the yarn tight, and snip the ends close to the pear. The yarn ends should retract back inside the pear after they are cut.
Squeeze and squash the pear to redistribute the stuffing inside and coax the pear back into its perfect shape."
Isn't it SO cute?!